
Learn the basics of 3D printing post-processing methods and how they are priced to choose the best finishing for your 3d printed part.
Introduction
3D printing post-processing is an essential step in additive manufacturing that ensures printed parts meet the requirements for real-world use.
While 3D printing enables rapid prototyping and the creation of complex geometries, raw printed parts often display surface roughness, visible layer lines, residual supports, or limited mechanical strength. Without proper post-processing, most 3D printed components cannot be used as final products.
Put simply, 3D printing makes it possible to create a part quickly, but post-processing is what transforms that part into a functional, reliable, and high-quality product. It is the key stage that bridges the gap between prototype and production, improving surface finish, dimensional accuracy, durability, and overall appearance.
Purposes of 3D Printing Post-Processing
The goals of 3D printing post-processing can be broadly divided into two categories: enhancing physical properties and improving chemical properties of printed parts.
Each purpose directly corresponds to specific post-processing methods and is often driven by the requirements of different industries.
|
Purpose |
Property Category |
Common Post-Processing Methods |
Typical Industry Needs |
|---|---|---|---|
|
Surface smoothing & improved aesthetics |
Physical |
Sanding, polishing, vapor smoothing, painting, dyeing |
Medical implants, consumer products, design prototypes |
|
Dimensional accuracy & precision |
Physical |
CNC machining, grinding, support removal, infiltration |
Aerospace tooling, automotive functional parts |
|
Enhanced mechanical strength |
Physical |
Heat treatment, annealing, Hot Isostatic Pressing (HIP) |
Aerospace engine components, heavy-duty industrial parts |
|
Improved wear & corrosion resistance |
Chemical |
Electroplating, anodizing, powder coating, UV coating |
Automotive parts, outdoor equipment, marine components |
|
Sealing porosity & increasing density |
Chemical |
Resin infiltration, epoxy coating, thermal sintering |
Medical devices, pressure vessels, fluid-handling systems |
|
Coloring & decorative finishes |
Chemical |
Dyeing, painting, plating, coating |
Consumer goods, fashion, electronics housings |
By aligning the right post-processing method with the desired property enhancement, manufacturers can ensure that 3D printed parts meet strict performance and visual requirements across industries.
If you want to explore the best 3D printing post-processing solution for your project, you can talk to our experts for tailored advice and cost estimates.
Types of 3D Printing Post-Processing
3D printing post-processing techniques vary depending on the material category and the target application.
In general, polymer parts require processes such as sanding, dyeing, or infiltration for better surface finish and aesthetics, while metal parts often undergo heat treatment, machining, or coating for strength and durability.
|
Material Category |
Typical Materials |
Common Printing Technologies |
Common Post-Processing Methods |
|---|---|---|---|
|
Polymers |
Nylon (PA12, PA11) |
SLS, MJF |
Cleaning (depowdering, bead blasting); Tumbling; Vapor smoothing; Dyeing; Epoxy/Seal coating; CNC Machining |
|
ABS |
FDM/FFF |
Sanding; Vapor smoothing; Painting; Machining |
|
|
PLA |
FDM/FFF |
Sanding; Epoxy coating; Painting |
|
|
PETG |
FDM/FFF |
Sanding; Painting (with primer); Flame polishing; Machining |
|
|
TPU |
SLS |
Dyeing; Cutting/Drilling |
|
|
Photopolymer Resins |
SLA |
Sanding & polishing; Painting/Coating |
|
|
Metals |
Stainless Steel / Tool Steels |
SLM/DMLS, Binder Jetting |
Heat treatment (annealing, tempering); Surface finishing (CNC, bead blasting); HIP (optional) |
|
Aluminum Alloys |
SLM/DMLS, Binder Jetting |
Heat treatment (solution/aging); Surface finishing (CNC, bead blasting); Anodizing |
|
|
Titanium Alloys (e.g., Ti6Al4V) |
SLM/DMLS |
HIP; Heat treatment; Surface finishing (CNC, bead blasting) |
|
|
Nickel-based Alloys (Inconel) |
SLM/DMLS, Binder Jetting |
HIP; Heat treatment |
Key Takeaways
Polymers:
● PA12/Nylon → Most common post-processing methods are bead blasting, polishing, and dyeing.
● ABS/PLA/PETG → Mainly support removal, sanding, and painting. Differences: ABS often uses acetone vapor smoothing, PLA often uses epoxy coating, PETG is suitable for flame polishing.
● TPU → Minimal post-processing, mainly dyeing and simple cutting.
● Resins → IPA cleaning + UV curing are essential, followed by polishing/painting.
Metals:
● Steels/Aluminum alloys → Common post-processing includes heat treatment, CNC machining, and surface coatings.
● Titanium alloys/Nickel-based alloys → HIP plus heat treatment are generally required, followed by machining.
● Copper alloys → Post-processing mainly focuses on oxidation protection (plating).
Before diving into each method, it is important to understand that 3D printing post-processing is not a one-size-fits-all solution. The choice of finishing technique depends on several factors, including the printing technology, material type, functional requirements, and cost constraints.
In the following sections, we will provide a detailed overview of the most widely used post-processing methods, explaining their working principles, compatibility, benefits, and limitations—helping you make informed decisions for your project.
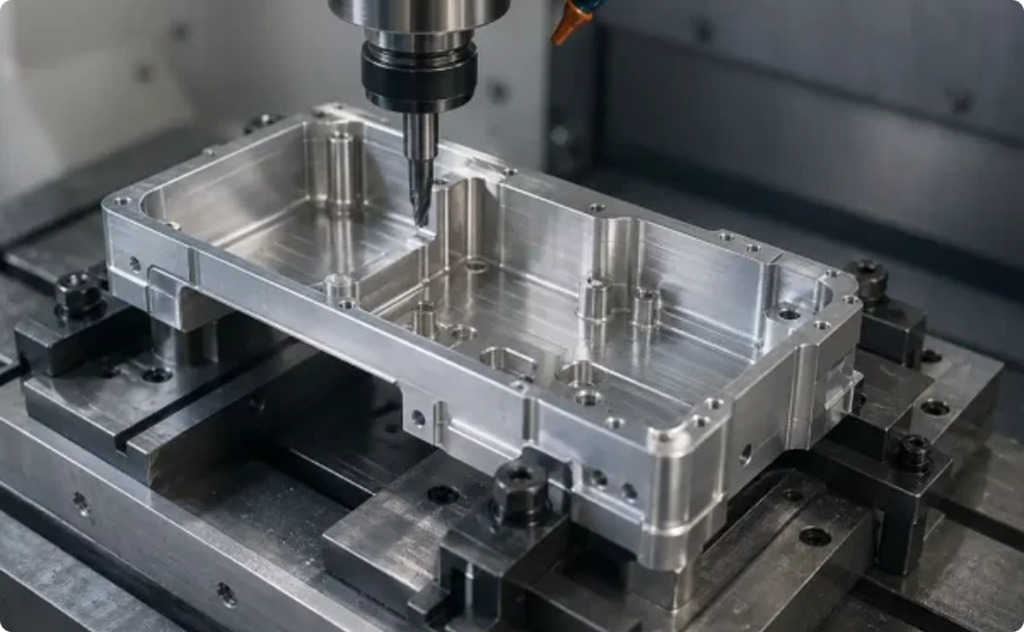
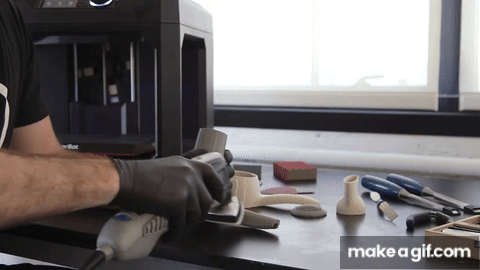
Sanding & Grinding (Polymer/Metal)
Source: makeagif.com
1. What it is
Sanding and grinding are mechanical 3D printing post-processing techniques that use abrasives to remove surface roughness, layer lines, or support marks.
2. Materials & Compatibility
-
Polymers: PLA, ABS, PETG, Nylon (FDM, SLS, MJF).
-
Metals: Aluminum, Stainless steel (SLM, DMLS).
3. Purpose
-
Improve surface smoothness.
-
Prepare parts for coating, painting, or dyeing.
-
Correct small dimensional deviations.
4. Process Steps
-
Coarse sanding → medium sanding → fine sanding or grinding → optional polishing.
-
Can be manual or machine-assisted.
Curious about the step-by-step approach to sanding, including grit progression and tool tips? Check out Unionfab’s detailed guide, “How to Sand 3D Prints? A Beginner’s Guide” to master the sanding workflow and avoid common mistakes.
5. Cost & Efficiency
-
Low cost, but labor-intensive.
-
Time-consuming for complex geometries.
-
Not ideal for high-volume production.
6. Advantages
-
Simple and widely accessible.
-
Effective for improving surface finish.
7. Limitations
-
Limited for intricate geometries.
-
Risk of altering dimensions or damaging thin walls.
8. Applications
-
Consumer prototypes requiring smoother aesthetics.
-
Automotive housings and casings.
-
Functional prototypes before painting or coating.
Vapor Smoothing (ABS, ASA, Nylon)

Source: fabbaloo.com
1. What it is
Vapor smoothing is a chemical post-processing method where solvent vapors (e.g., acetone) melt the outer layer of a printed part to achieve a smooth, glossy finish.
2. Materials & Compatibility
-
Polymers: ABS, ASA, Nylon.
-
Printing methods: FDM, SLS, MJF.
3. Purpose
-
Eliminate visible layer lines.
-
Improve surface sealing and reduce porosity.
-
Enhance aesthetics for consumer products.
4. Process Steps
Expose part to solvent vapor in a controlled chamber → solvent melts surface → smooth finish upon drying.
5. Cost & Efficiency
-
Moderate cost; semi-automated solutions available.
-
Fast and suitable for small-batch production.
6. Advantages
-
Produces glossy, professional appearance.
-
Reduces porosity, making parts more liquid-resistant.
7. Limitations
-
Only works with solvent-sensitive materials.
-
Can weaken fine details if overexposed.
8. Applications
Consumer products (toys, housings), Medical casings requiring smooth surfaces, Aesthetic prototypes.
Looking for detailed guidance on implementing vapor smoothing safely and effectively? Explore Unionfab’s in-depth article, “Vapor Smoothing: Elevating 3D Printing”, which covers best practices, machine setup, and material-specific techniques.
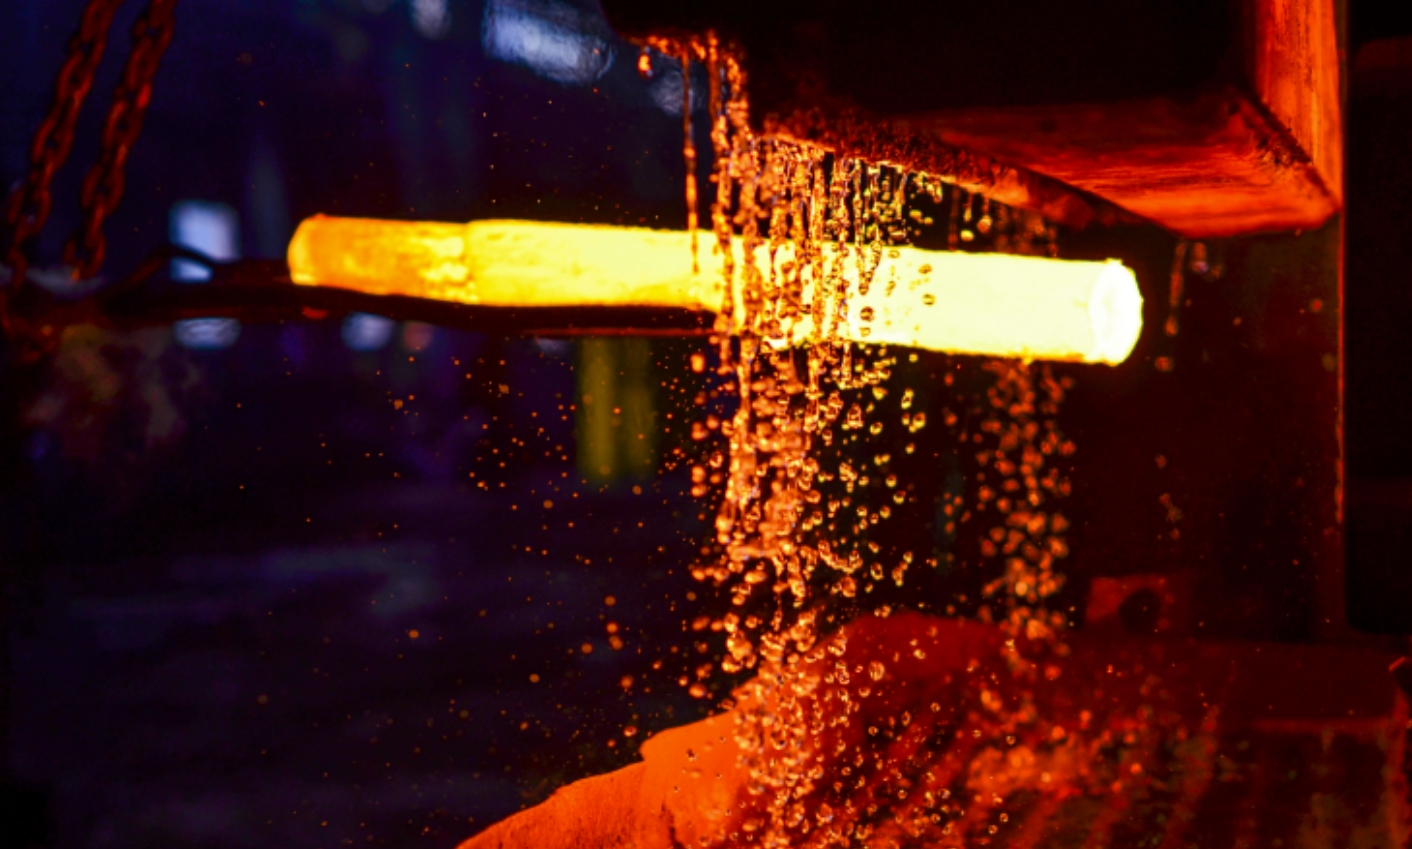
Heat Treatment / Annealing (Metals, High-Temp Polymers)
Source: 3dspro.com
1. What it is
Heat treatment or annealing is a thermal 3D printing post-processing technique used to relieve internal stresses and improve the mechanical strength of printed parts.
2. Materials & Compatibility
Metals: Stainless steel, Aluminum, Titanium (SLM, DMLS).
Polymers: Nylon, ULTEM, PEEK (SLS, FDM).
3. Purpose
-
Improve strength and thermal resistance.
-
Enhance dimensional stability.
-
Relieve residual stress from the printing process.
4. Process Steps
Controlled heating → soaking/holding at target temperature → slow cooling.
For step‑by‑step instructions for annealing different materials, read Unionfab’s detailed guide, “Guide to Annealing 3D Prints [+ Why & How]”.
5. Cost & Efficiency
-
Medium to high cost depending on furnace setup.
-
Suitable for both prototypes and production.
6. Advantages
-
Significant mechanical property improvements.
-
Enables parts for demanding environments.
7. Limitations
-
Requires specialized furnaces.
-
Potential distortion if not controlled.
8. Applications
Aerospace components, Automotive engine parts, High-performance polymer applications.
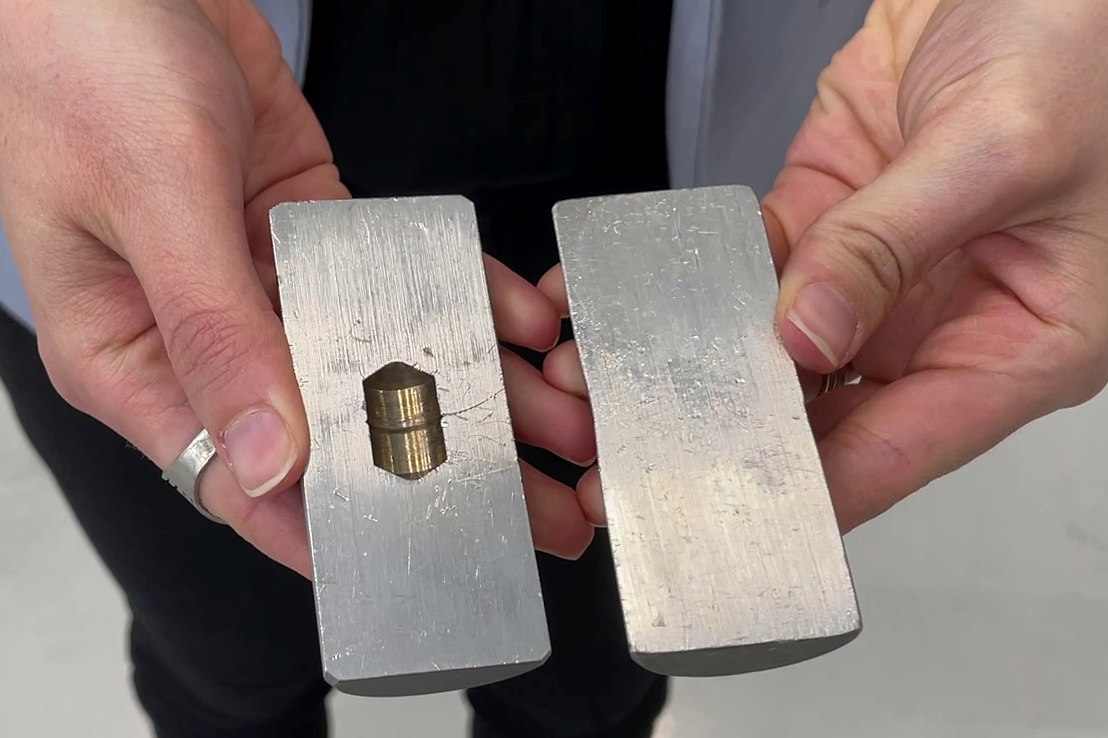
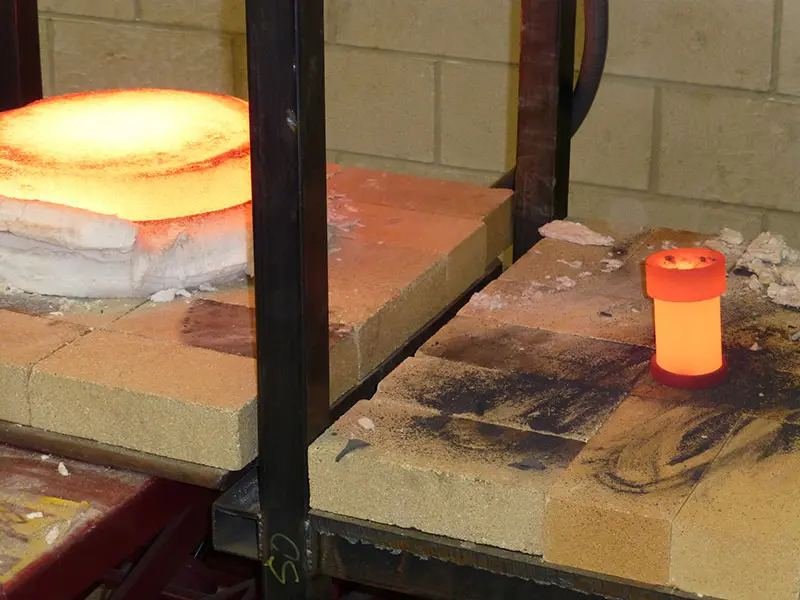
Hot Isostatic Pressing (HIP)
Source: additivemanufacturing.media
1. What it is
Hot Isostatic Pressing (HIP) is a high-pressure, high-temperature post-processing method that eliminates internal porosity in metal 3D printed parts.
2. Materials & Compatibility
● Metals: Titanium, Inconel, Stainless steel, Cobalt-Chrome.
● Printing methods: SLM, DMLS, EBM.
3. Purpose
● Remove porosity and increase density.
● Enhance fatigue strength and durability.
4. Process Steps
● Place part in HIP chamber → apply high heat and isostatic pressure (inert gas) → cooling.
5. Cost & Efficiency
● High cost, suitable for critical parts.
● Slower process, usually outsourced.
6. Advantages
● Produces near-wrought material properties.
● Greatly increases component reliability.
7. Limitations
● Expensive equipment and processing cost.
● Limited availability.
8. Applications
● Aerospace turbine blades.
● Medical implants (hip/knee replacements).
● High-performance automotive parts.
Electroplating / Anodizing
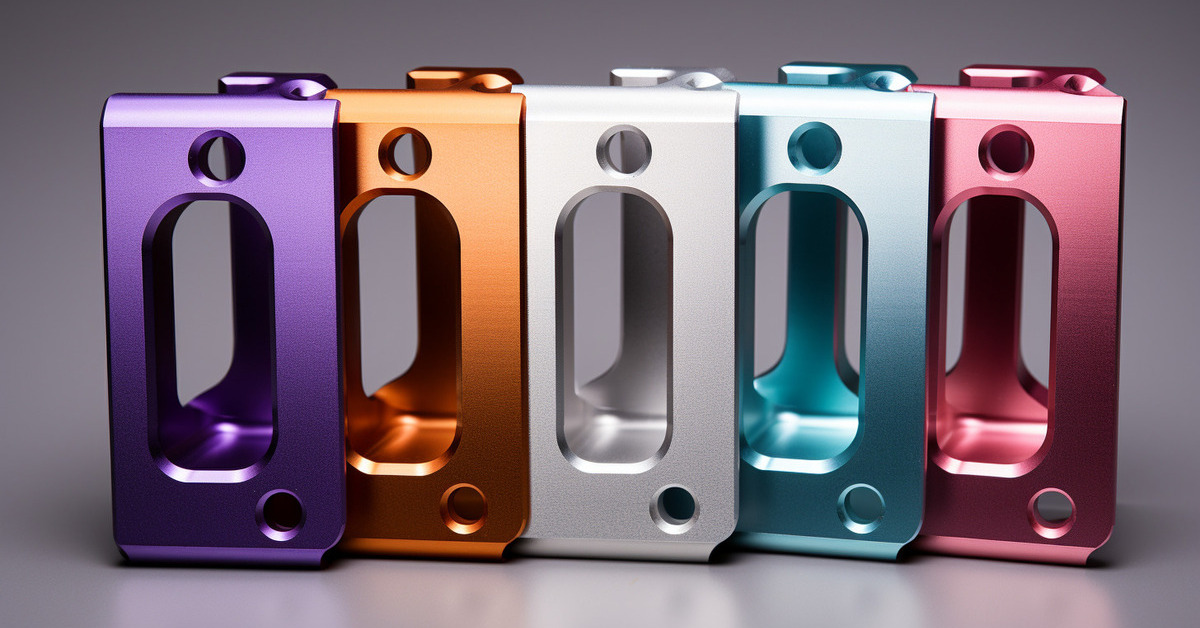
Source: 3dspro.com
1. What it is
Electroplating and anodizing are surface finishing post-processing methods that deposit a protective or decorative layer on the part surface.
2. Materials & Compatibility
-
Metals: Aluminum (anodizing), Steel (electroplating).
-
Polymers: Conductive-coated polymers can also be electroplated.
3. Purpose
-
Improve corrosion resistance and wear resistance.
-
Enhance appearance with decorative finishes.
4. Process Steps
Surface preparation → electrolyte bath → electrical current application (electroplating) or anodic oxidation (anodizing).
Curious about creating vivid, durable finishes on titanium parts? Explore Unionfab’s comprehensive guide, “Understanding Titanium Anodizing”.
5. Cost & Efficiency
-
Medium cost.
-
Scalable for batch production.
6. Advantages
-
Strong protective coating.
-
Wide range of decorative options (colors, finishes).
7. Limitations
-
Limited to certain materials.
-
May require masking to protect functional areas.
8. Applications
Automotive components, Consumer electronics housings, Aerospace fasteners and brackets.
Painting & Dyeing
Source: 3dnatives.com
1. What it is
Painting and dyeing are post-processing techniques used to add color, branding, or aesthetic finishes to 3D printed parts.
2. Materials & Compatibility
-
Polymers: Nylon, ABS, PLA, SLA resins.
-
Metals: Painted after primer or coating.
3. Purpose
-
Enhance appearance and customization.
-
Provide basic UV and surface protection.
4. Process Steps
Surface preparation → primer application (if needed) → dyeing or painting → drying.
5. Cost & Efficiency
-
Low to medium cost.
-
Fast turnaround, scalable.
6. Advantages
-
Wide color and finish options.
-
Simple and effective for consumer parts.
7. Limitations
-
Limited durability compared to plating or coating.
-
Requires additional protection for outdoor use.
8. Applications
-
Consumer goods and prototypes.
-
Industrial equipment housings.
-
Fashion and lifestyle products.
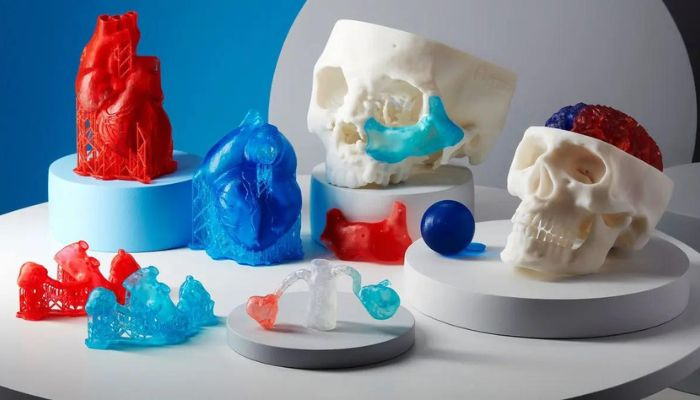
Infiltration & Coating (Resins, Porous Polymers)
Source: surfaceengineering.com
1. What it is
Infiltration and coating are 3D printing post-processing techniques that seal porous parts by impregnating them with resin, wax, or epoxy.
2. Materials & Compatibility
-
Polymers: Nylon (SLS), resin prints (SLA/DLP).
-
Porous ceramics and sand-printed molds.
3. Purpose
-
Seal porosity for liquid or gas containment.
-
Increase strength and durability.
-
Improve appearance.
4. Process Steps
Clean part → immerse or brush with resin/epoxy → curing.
5. Cost & Efficiency
-
Medium cost depending on coating method.
-
Scalable with automated infiltration systems.
6. Advantages
-
Improves functional performance.
-
Enhances mechanical properties of porous parts.
7. Limitations
-
Adds processing time.
-
May change part color or surface feel.
8. Applications
-
Medical and dental models.
-
Functional prototypes requiring airtightness.
-
Sand cores for casting.
Mirror Polishing
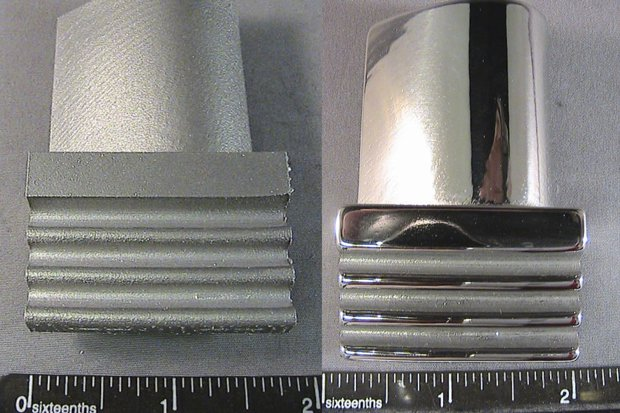
Source: tctmagazine.com
1. What it is
Mirror polishing is a finishing method that uses mechanical or chemical techniques to polish a surface until it achieves a reflective, mirror-like appearance.
2. Materials & Compatibility
-
Best suited for metal parts such as stainless steel, titanium, or aluminum produced by SLM/DMLS.
-
Occasionally applied to resin parts from SLA/DLP for aesthetic purposes.
3. Purpose
-
Improve surface roughness and achieve a high-quality visual appearance.
-
Enhance corrosion resistance and reduce friction.
4. Process Steps
-
Coarse grinding → fine grinding → polishing paste application → final precision polishing.
-
Requires polishing machines, abrasives, and sometimes chemical aids.
-
For a step-by-step walkthrough on achieving flawless polished metal surfaces, don’t miss Unionfab’s in-depth article, “How to Polish Stainless Steel: Step-by-Step Guide & Tips”.
5. Cost & Efficiency
-
High cost and time-consuming due to multiple stages.
-
Not efficient for large-batch production but suitable for high-value parts.
6. Advantages
-
Produces a highly reflective surface with superior aesthetics.
-
Improves durability and reduces surface friction.
7. Limitations
-
Complex geometries are difficult to polish evenly.
-
Labor-intensive, making it costly for mass production.
8. Applications
-
Medical implants requiring smooth, non-porous finishes.
-
Aerospace and automotive components for improved performance.
-
Luxury goods and molds requiring premium surface quality.
Bead Blasting (Polymer/Metal)
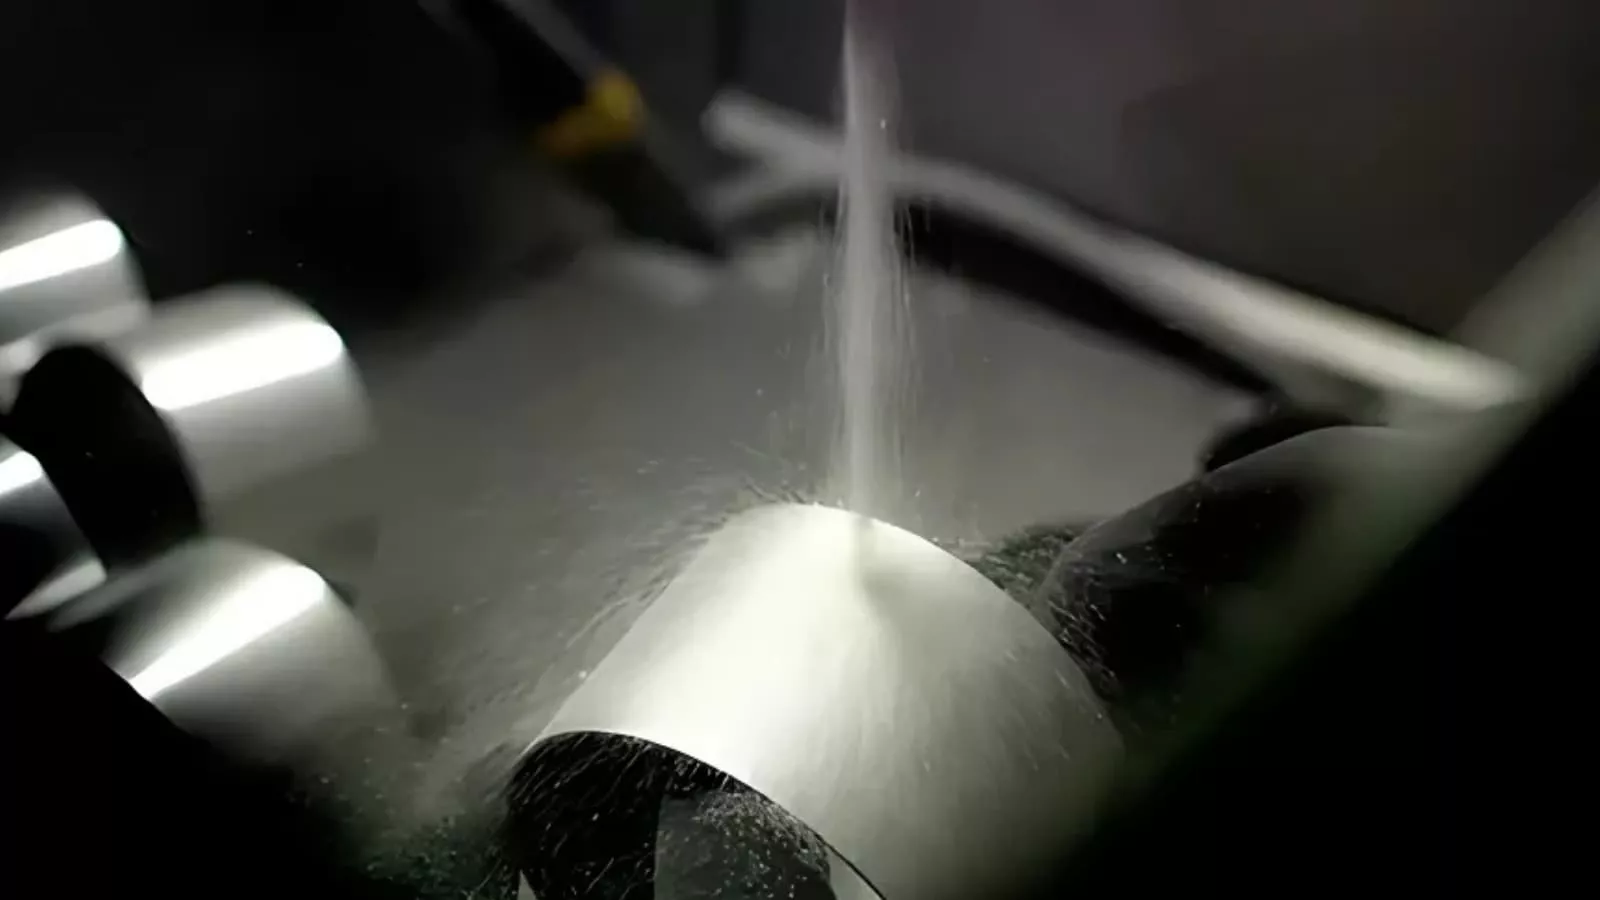
Source: rapiddirect.com
1. What it is
Bead blasting is a 3D printing post-processing method that employs high-pressure streams of small glass or ceramic beads, creating a uniform matte or satin finish while preserving part geometry—ideal for both polymer and metal prints.
2. Materials & Compatibility
-
Polymers: Nylon (SLS, MJF) and reinforced plastics.
-
Metals: Aluminum, stainless steel, titanium (from SLM, DMLS, Binder Jetting).
-
Also used for resin parts needing light surface cleaning.
3. Purpose
-
Remove powder residue, oxidation, or contaminants.
-
Create surface uniformity and matte texture.
-
Prepare parts for painting, plating, or coating.
4. Process Steps
-
Load part into bead blasting cabinet → subject it to bead blasting using compressed air or centrifugal force → reposition for consistent coverage.
-
Suitable for manual or automated systems.
For a detailed breakdown of bead blasting media options, equipment, and best practices, check out Unionfab’s comprehensive guide: “A Complete Guide to Bead Blasting.”
5. Cost & Efficiency
-
Medium cost, scalable for batches.
-
Fast processing suitable for production environments.
6. Advantages
-
Delivers consistent, smooth matte finishes.
-
Preserves tight tolerances and fine features.
-
Effective on complex geometries.
7. Limitations
-
Not suitable for achieving glossy finishes.
-
May slightly erode delicate or thin-walled areas.
-
Requires dedicated blasting equipment and dust control.
8. Applications
-
Aerospace and automotive components needing uniform finishes.
-
SLS/MJF polymer prototypes before dyeing or coating.
-
Medical instruments requiring clean, sterilized surfaces.
Since there are many different 3D printing post-processing methods, it can be challenging to determine which one best suits your part. Each technique offers unique advantages in terms of surface quality, mechanical performance, cost, and efficiency.
To help you quickly compare options, the following table summarizes the most common post-processing methods, their suitable materials, purposes, and typical applications3D Printing Post-Processing Comparison Table
|
Post-Processing Method |
Suitable Materials |
Main Purpose |
Cost Level |
Efficiency |
Typical Applications |
|---|---|---|---|---|---|
|
Sanding & Grinding |
Polymers (PLA, ABS, Nylon), Metals (Aluminum, Steel) |
Surface smoothing, dimensional correction |
Low |
Labor-intensive, slow for complex parts |
Consumer prototypes, casings, pre-coating prep |
|
Vapor Smoothing |
ABS, ASA, Nylon (FDM, SLS, MJF) |
Smooth glossy finish, reduce porosity |
Medium |
Fast, semi-automated possible |
Consumer goods, medical casings, aesthetic models |
|
Heat Treatment / Annealing |
Metals (Steel, Ti, Al), High-temp Polymers (Nylon, PEEK) |
Stress relief, strength & thermal resistance |
Medium–High |
Moderate, requires furnaces |
Aerospace parts, automotive engine components |
    |