Design tool-free 3D printed snap-fit joints for fast, durable assembly—explore TPU, Nylon, PETG, and expert FDM/SLS tips for real-world applications.
Introduction
What is a Snap-Fit?
A snap-fit is a type of mechanical joint that enables quick assembly and disassembly using elastic deformation. It eliminates the need for screws, adhesives, or other fasteners. Widely used in electronics, consumer products, and modular components, snap-fit joints are especially well-suited for 3D printing due to their cost-effectiveness and ease of fabrication.
Common Snap-Fit Types
Cantilever (Most Common, Single-Sided Insertion)
A single flexible arm that locks into place with a one-sided insertion. Subtypes include:

-
Straight Cantilever: A simple straight arm with a hook or tab at the end (e.g., used in food container lids for easy locking).
-
L-shaped Cantilever: Features a right-angle bend, ideal for compact spaces (e.g., latches in electronics enclosures).
-
U-shaped Cantilever: Two parallel arms forming a U-shape, offering balanced flexibility (e.g., in medical device casings).
Annular (Ring Structure)

Source: hp.com
A circular snap fit that uses radial flexibility (expansion/contraction) to lock, such as bottle caps, jar lids, or pipe fittings.
Torsional

Source: hp.com
Engages through rotational deformation, requiring a twisting motion to lock (e.g., hose couplings or electrical plugs).
Latching
Source: pingood.com.tw
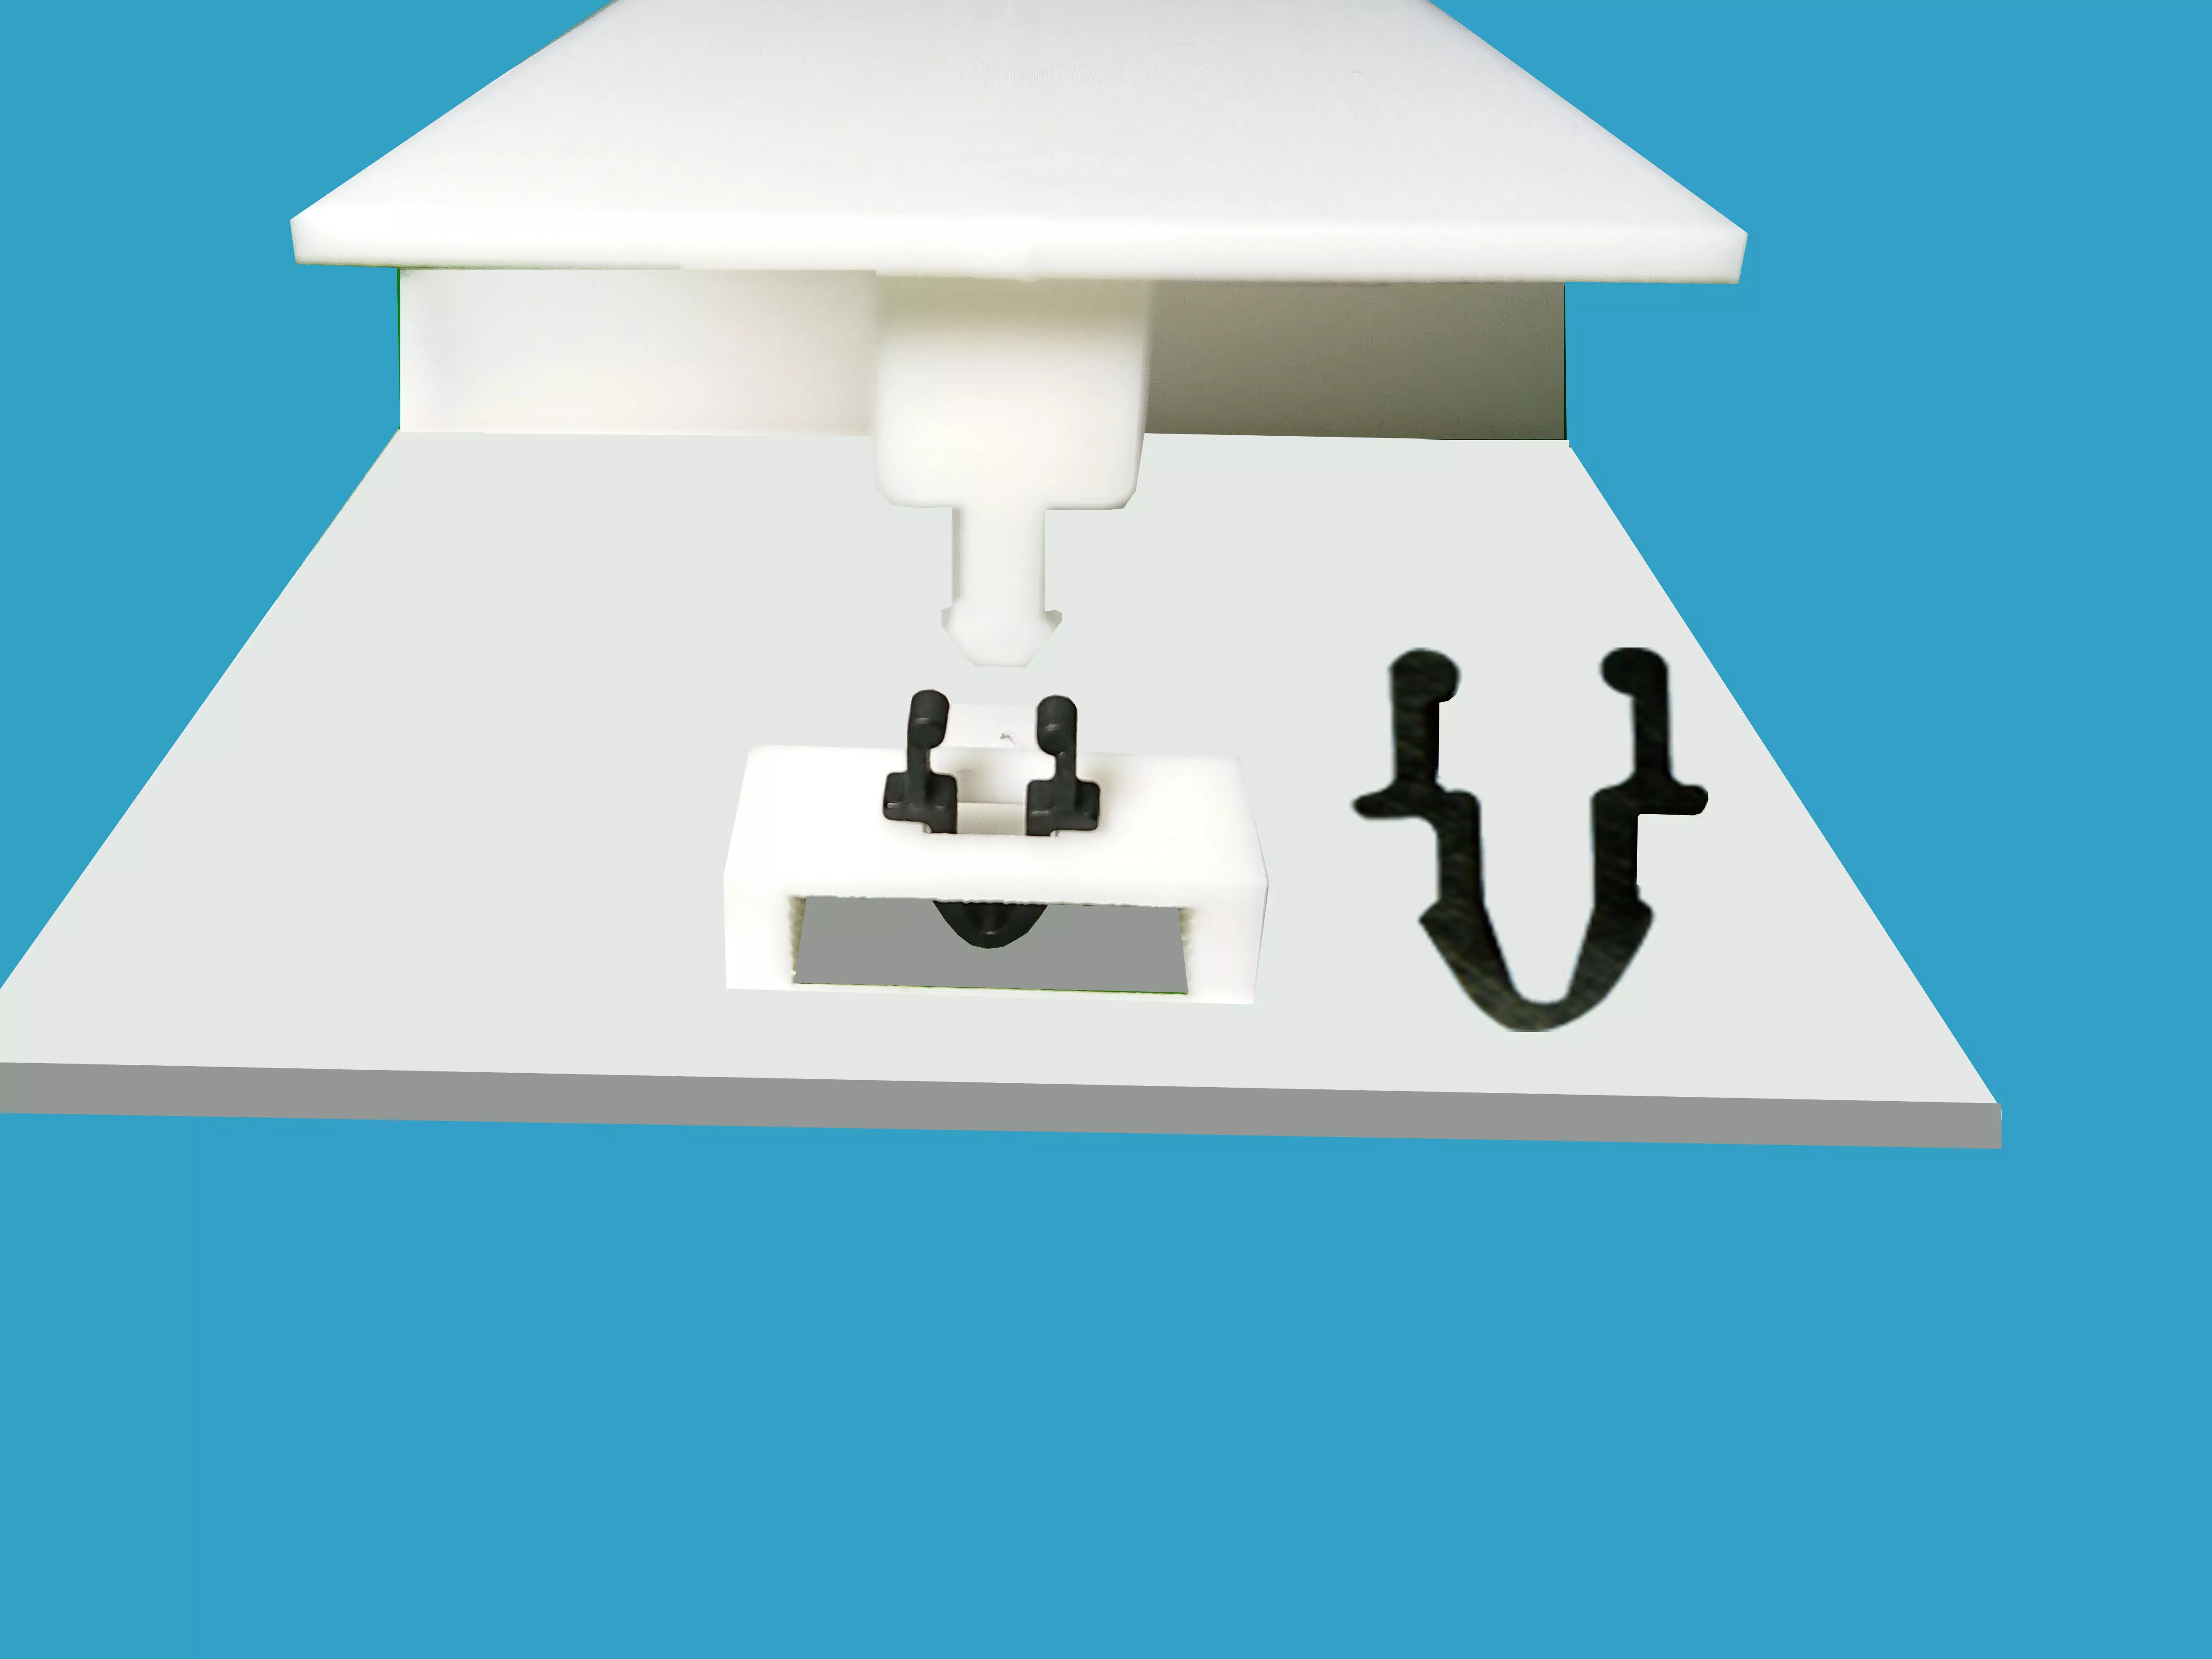
Two separate components (a hook and a slot) that interlock and can be manually unlocked, like safety harnesses or smartphone back covers.
Snap Fit Manufacturing Processes
|
Manufacturing Process |
Suitability for Snap Fits |
Description |
|---|---|---|
|
3D Printing |
Highly Suitable |
Ideal for rapid prototyping, custom designs, and low-volume production. Enables quick design iteration with flexible materials like TPU/Nylon. |
|
Injection Molding |
Most Common |
The standard for high-volume production, especially for plastic parts (e.g., electronics casings, toys). Offers cost efficiency at scale. |
|
CNC Machining |
Limited |
Poorly suited for flexible components (metals/hard materials lack elasticity). Best for rigid prototypes with simple geometries. |
|
Silicone Molding + Casting |
Feasible for Low-Volume |
Used to produce small batches of flexible snap fits (e.g., resin-cast clips) with moderate precision and flexibility. |
Key Takeaway:
3D printing is the most versatile for snap fits, especially in early design stages. It allows rapid testing of locking mechanisms, easy modification of flexible arms/hooks, and supports materials that mimic production-grade elasticity.
3D Printing Processes for Snap Fits
1. Fused Deposition Modeling (FDM/FFF)
-
How it works: Melts thermoplastic filaments (e.g., PLA, PETG, TPU) and deposits them layer by layer to build parts.
-
Why it’s ideal: Flexibility: Supports elastic materials (e.g., TPU) for bendable cantilever arms or torsion springs.
-
Speed: Rapid turnaround for prototyping, allowing same-day design iterations.
-
Cost: Affordable for small batches or one-off custom designs.
-
2. Multi Jet Fusion (MJF) / Selective Laser Sintering (SLS)
-
How it works:
-
MJF: Fuses fine nylon powder (e.g., PA12, PA11) using a fusing agent and infrared energy.
-
SLS: Sintering nylon powder with a high-powered laser in a powder bed.
-
-
Why they’re ideal for snap fits:
-
Material Strength: Nylon parts have high tensile strength and fatigue resistance—ideal for repeated snap actions.
-
Elastic Recovery: PA11 and PA12 exhibit excellent shape memory, supporting tight tolerances without permanent deformation.
-
Isotropic Properties: Near-uniform strength in all directions—critical for flexible arms or latches.
-
No Support Structures: Enables printing of complex or nested snap geometries.
-
Surface Finish: MJF offers better detail and consistency; SLS is slightly rougher but similarly strong.
-
Want to bring your snap fit model to life? Choose Unionfab—your professional 3D printing partner for fast, reliable results from concept to production!

Material Selection
Selecting the right material is critical to achieving durable, functional, and reusable snap-fit mechanisms. The ideal material must withstand stress concentrations, flex repeatedly without fatigue, and provide consistent shape recovery after deflection.
1. Key Material Requirements
-
Flexibility
-
The material should bend without cracking, especially in cantilever or living hinge designs where repeated deflection is expected.
-
-
Elastic Recovery
-
It must return to its original shape after deformation to ensure a secure, reusable snap-fit engagement.
-
-
Fatigue Resistance
-
The material should withstand repeated cycles of stress without permanent deformation or failure.
-
-
Layer Adhesion
-
In 3D printing, strong inter-layer bonding is crucial to prevent delamination, especially in parts subjected to flexing or bending.
-
-
Printability
-
Materials should offer good dimensional accuracy, surface quality, and consistency to meet tight snap-fit tolerances.
-
-
Impact Strength
-
Important for applications where snap-fits may experience sudden forces during assembly or in use.
-
2. Recommended Materials for Snap-Fit Manufacturing

|
Material |
Flexibility |
Elastic Recovery |
Fatigue Resistance |
Layer Adhesion |
Printability |
Impact Strength |
|---|---|---|---|---|---|---|
|
Nylon (PA12/11) |
⭐⭐⭐ |
⭐⭐⭐☆* |
⭐⭐⭐⭐⭐ |
⭐⭐⭐☆ |
⭐⭐☆ |
⭐⭐⭐☆ |
|
PETG |
⭐⭐☆ |
⭐⭐☆ |
⭐⭐☆ |
⭐⭐⭐☆ |
⭐⭐⭐☆ |
⭐⭐⭐☆ |
|
ABS |
⭐⭐☆ |
⭐⭐☆ |
⭐⭐☆ |
⭐⭐☆ |
⭐⭐☆ |
⭐⭐⭐☆ |
|
PLA |
⭐☆ |
⭐☆ |
⭐☆ |
⭐⭐⭐☆ |
⭐⭐⭐⭐⭐ |
⭐⭐☆ |
|
TPU |
⭐⭐⭐⭐⭐ |
⭐⭐⭐⭐⭐ |
⭐⭐⭐⭐☆ |
⭐⭐⭐☆ |
⭐⭐⭐☆ |
⭐⭐⭐☆ |
|
ASA |
⭐⭐☆ |
⭐⭐☆ |
⭐⭐⭐☆ |
⭐⭐⭐☆ |
⭐⭐☆ |
⭐⭐⭐☆ |
|
PC (Polycarbonate) |
⭐⭐⭐☆ |
⭐⭐⭐☆ |
⭐⭐⭐☆ |
⭐⭐☆ |
⭐☆ |
⭐⭐⭐⭐⭐ |
*Note: ☆=1/2⭐
3. Material Selection Tips by Use Case
Snap-fit components come in many forms, but they can all be grouped according to their functional scenarios. Below is a breakdown of typical snap-fit use cases, along with recommended 3D printing materials tailored to the performance requirements of each application.
-
High-cycle snap-fit clips
-
Recommended Materials: Nylon, TPU
-
Reason: Offer superior fatigue resistance and flexibility, enabling them to withstand frequent opening and closing operations without easily getting damaged.
-
General-purpose parts
-
Recommended Materials: PETG, ABS
-
Reason: Strike a good balance between durability and printability. They can meet the strength requirements of general usage scenarios while being easy to 3D print.
-
Outdoor use
-
Recommended Materials: ASA, PETG
-
Reason: Possess excellent UV and weather resistance, allowing them to be used outdoors for long periods without aging rapidly.
-
Prototyping / low-stress fits
-
Recommended Materials: PLA+, Tough PLA
-
Reason: Easy to print and have a fast printing speed, enabling the rapid production of prototypes. Suitable for assembly scenarios with low stress.
-
Flexible / soft interfaces
-
Recommended Material: TPU
-
Reason: Have high elasticity, providing a comfortable touch. Ideal for applications requiring soft and deformable interfaces.
-
Structural or heat-tolerant parts
-
Recommended Materials: PC, Nylon
-
Reason: Feature high strength and good thermal resistance, meeting the manufacturing requirements of parts with demands for structural strength and high-temperature tolerance.
Still unsure which material to choose? Talk to Unionfab experts to help you make final decisions.
Snap-Fit Design Guidelines
Designing effective snap-fit components in 3D printing requires balancing flexibility, strength, and dimensional accuracy. This guide covers geometry considerations, and tolerance strategies to ensure durable and functional snap mechanisms.
Dimensions & Tolerances
These geometric rules help you design snap-fits that function reliably, even under repeated use and varying print conditions.
Clearance / Gap Tolerance
-
Recommended: 0.2–0.5 mm, depending on the printer’s dimensional accuracy and material shrinkage.
-
Purpose: Prevents parts from fusing or being too tight.
-
Adjustment: For softer or more flexible materials (e.g., PETG, TPU), tighter clearances (~0.2 mm) may work. For stiffer materials or less accurate printers, go closer to 0.5 mm.
Arm Length
-
Rule of thumb: 2–3× the arm thickness.
-
Effect: Longer arms provide greater flexibility and easier snap engagement but may be more prone to fatigue. Shorter arms are stiffer but more durable.
-
Design Note: Keep a consistent cross-section and avoid sudden thickness changes to reduce stress concentration.
Hook Angle
-
Insertion Angle: 30°–45° recommended.
-
Explanation:
-
Lower angles (30°): Easier to insert, but weaker holding force.
-
Higher angles (45°+): Greater retention, but harder to engage or disengage.
-
-
Tip: Consider using asymmetrical hooks—shallow angle for insertion side, steeper on the locking side.
Fillets and Radii
-
Why: Sharp corners at the base of the snap arm act as stress risers and can lead to failure during flexing.
-
Suggestion:
-
Add fillets with radius = 0.5–1.0× arm thickness at the base of snap arms.
-
Smooth transitions between hook, arm, and base improve durability.
-
Lead-in Angles / Chamfers
-
Purpose: Chamfers or tapered entries guide the snap feature into place during assembly.
-
Angle Range: 20°–30° lead-in on hooks and mating surfaces is ideal.
-
Design Bonus: Improves user experience by reducing required insertion force and misalignment risk.
Undercuts & Retention Geometry
-
For strong locking, integrate subtle undercuts or stepped grooves—but avoid excessive interference which can cause cracking.
-
Use slicer preview to verify printability of undercut features or consider using breakaway supports if needed.
Material-Specific Notes
-
PLA: Brittle; suitable for one-time snaps or non-critical features.
-
PETG: Good balance of strength and flexibility; ideal for reusable snap-fits.
-
ABS/ASA: Tough, weather-resistant; great for functional outdoor parts.
-
Nylon: Excellent fatigue resistance; best choice for high-cycle snapping.
-
TPU: Highly flexible; useful for interference fits or soft latching mechanisms.
Testing & Iteration Tips
-
Prototype quickly using draft print settings to verify tolerances and clearances.
-
Print in intended orientation and test snap-fit behavior in real-world conditions.
-
Use modifier meshes to increase infill only in snap regions for strength without wasting material.
Printing Parameters & Orientation
Choosing the right print settings and orientation is crucial for strong, functional, and reliable snap-fit components. Below are detailed recommendations to help optimize strength, flexibility, and print quality.
Layer Height
Recommended: 0.1–0.2 mm
Why it matters:
-
Smaller layer heights (e.g., 0.1 mm) give finer detail and smoother surfaces, ideal for tight-fitting snap features.
-
Larger layer heights (e.g., 0.2 mm) print faster but may create rougher surfaces and weaker layer adhesion.
Tip:
For precision snap-fits or parts that require frequent engagement, use ≤ 0.15 mm for better dimensional accuracy.
Wall/Perimeter Thickness
Recommended: ≥ 1.2 mm (3 or more perimeters)
Why it matters:
-
Thicker walls increase strength in flexible arms and hook regions.
-
Critical for preventing cracks at stress points, especially in cantilever snap joints.
Tip:
Use 3–4 wall lines, or wall thickness = 3× nozzle diameter (e.g., 0.4 mm nozzle → 1.2 mm wall).
Printing Temperature
Why it matters:
Correct extrusion temperature ensures strong inter-layer adhesion. Too low = weak layers, too high = stringing or deformation.
|
Material |
Nozzle Temp |
Bed Temp |
Notes |
|---|---|---|---|
|
PLA |
190–210°C |
50–60°C |
Keep cooling fan on for crisp detail |
|
PETG |
230–250°C |
70–90°C |
Reduce fan speed to strengthen layers |
|
ABS |
230–250°C |
90–110°C |
Enclosure recommended to reduce warping |
|
ASA |
240–260°C |
90–110°C |
Good ventilation needed for fumes |
|
Nylon |
240–260°C |
70–90°C |
Must dry before printing to avoid bubbling |
Print Orientation
Goal: Maximize snap-fit durability and avoid layer separation under stress.
Best Practices:
-
Align flex direction parallel to the layers (XY plane): This ensures the part bends across layers, not between them.
-
Avoid printing snap arms upright (Z-axis) — they are more likely to break at the layer lines.
Examples:
-
For a U-shaped snap: lay the part flat so the arms extend in the XY direction.
-
For a cantilever hook: orient the hook horizontally to align its base along the layers.
Support Settings
Why it matters:
Snap-fits often include overhangs and hooks that require support. Improper support can damage delicate features or make post-processing difficult.Recommendations:
-
Enable support only where needed.
-
Use “touching buildplate only” or support blockers to avoid internal cavities getting filled.
-
Design with 45° overhangs where possible to eliminate the need for supports.
Post-Processing Tips
1. Deburring and Cleaning
Purpose:
Remove stringing, rough edges, or blobs to ensure smooth snapping.How to do it:
-
Use a hobby knife or small file to clean up hooks and slots.
-
Focus on key contact areas where parts engage.
Note:
Avoid removing too much material—this may affect fit.
2. Sanding and Smoothing
Purpose:
Improve surface finish and reduce friction between snap parts.How to do it:
-
Sand with 400–1000 grit sandpaper for a smoother surface.
-
For ABS, use acetone vapor smoothing to polish surfaces.
Note:
Don’t over-sand locking features to prevent looseness.
3. Heat Treatment (Annealing)
Purpose:
Increase strength, reduce internal stress, and improve durability.How to do it:
-
Place parts in an oven:
-
PETG: 70–80°C for 1 hour
-
ABS: 100°C for 30–60 minutes
-
Nylon: 90°C for 1–2 hours
-
-
Let them cool down slowly inside the oven to avoid warping.
Note:
Use a temperature-controlled oven—not a heat gun or open flame.
4. Fit Adjustment
Purpose:
Fine-tune the fit if it’s too tight or loose.How to do it:
-
Sand or trim snap arms or holes slightly.
-
Use a drill to widen tight holes carefully.
-
For deformed parts, use a low-temp heat gun to reshape.
Note: